In this tutorial we’ll walk through the process of creating a desaturated, cinema-inspired effect in Lightroom’s develop module. The process is pretty simple, it works well with a wide variety of photos, and it creates an interesting and dramatic effect.
Here is a look at the sample “before” photo.


If you’d like to add a similar effect to your own photos you can follow the steps taken in this tutorial, and we’re also making it available as a Lightroom preset that can be downloaded for free at the end of this article. The effect that we’re creating in this tutorial is from our Desaturated Cinema Preset from our set of Cinematic Lightroom Presets. The full set includes 10 cinema-style Lightroom presets.
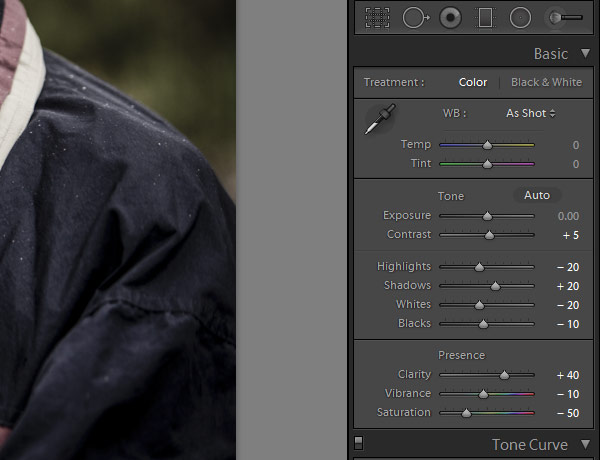
Ok, let’s get started. Many of the settings that we’ll be adjusting are found in the “Basic” section of Lightroom’s develop module.
We’ll apply a slight boost in contrast by changing the contrast setting to +5. We’ll set the highlights, shadows, whites, and blacks to -20, +20, -20, and -10 respectively. This will give the image a greater dynamic range without taking it to the extreme, and it will also give us a slightly stronger black point.
In the presence section, we’ll set the clarity to 40, which will give the image a bit of a stronger and sharper look. We’ll set the vibrance to -10 and the saturation to -50, which will take some of the color out of the photo.
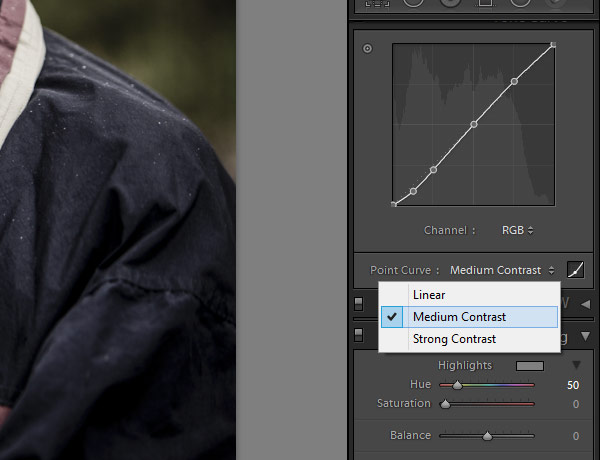
Next, in the “tone curve” section select the curve preset called “medium contrast”, which will add a little bit more contrast to the photo.
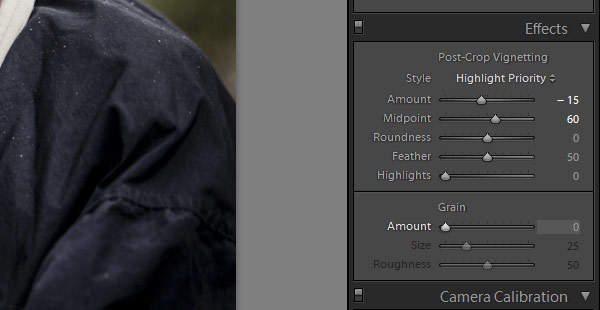
And the last thing we’ll do is add a subtle vignette. Go to the “effects” section and in the “post crop vignetting” settings set the amount to -15 and the midpoint to 60.
That’s it! We now have the effect completed, and here is another look at the after photo.
No comments:
Post a Comment