Here’s an example of how I created a Develop Preset to use when I import photos taken with my Fujifilm X-T1 camera. The idea was to create a preset that takes me to a neutral starting point from where I can process the file. You can follow along to create an import Develop Preset for your own camera. I’ll explain what I’m doing at each step and suggest some variations you can try.
Start by selecting a photo taken with the camera that you are going to create the Develop Preset for and open it in the Develop module. Zero all the settings by pressing the Reset button at the bottom (you may find it helpful to make a Virtual Copy of the photo first so you don’t undo any edits you have already made).
1. Camera Calibration panel
I set Process to 2012 (Current) the most recent, and Profile to Classic Chrome (the Film Simulation setting I use most often). The Profile options available to you vary depending on the camera.
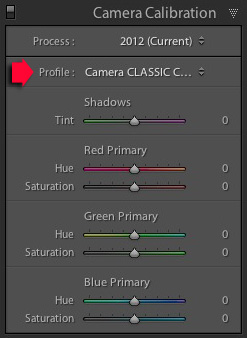
Possible variation: You can create a different Develop Preset for each Profile that you regularly use.
2. Lens Corrections panel
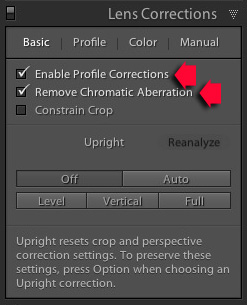 I don’t have to do anything here for the X-T1 as lens corrections are carried out by the camera, saved within the Raw file, and automatically applied by Lightroom.
Most cameras don’t do this, so if this applies to you then go to the Basic tab and tick the Enable Profile Corrections and Remove Chromatic Aberration boxes. Then go to the Profile tab and set Setup to Auto so that Lightroom adjusts the settings according to what lens is mounted on the camera.
3. Basic panel
Set White Balance to As Shot and make sure all the other sliders are zeroed.
Possible variation #1: Tick the Auto Tone box to have Lightroom automatically set the Exposure, Contrast, Highlights, Shadows, Whites and Blacks sliders. This is a matter of preference, I don’t do this as I prefer to set them myself.
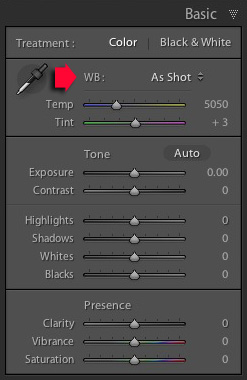
Possible variation #2: Create one preset for colour photos, and another for those you intend to convert to black and white by setting Treatment to Black & White.
Creating the Preset
Go to the Develop Preset panel (on the left side) and click the Create New Preset icon (the plus sign at the top, to the right of the word “Presets”). This brings up the New Develop Preset window. Give the Preset a name and select a folder to save it in (User Presets is a good one). Click the Check All button and press Create when you are ready to save the Preset.
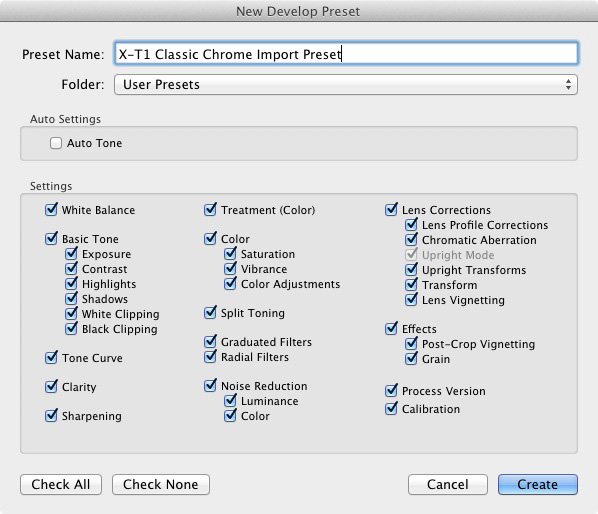
That’s it! It’s a simple process that doesn’t take very long and can save you a lot of time when you import your photos.
Applying Develop Presets upon Import
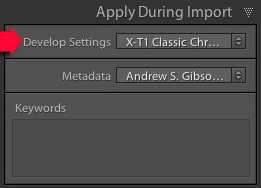 To apply the Develop Preset you just created, launch the Import Window and go to the Apply During Import panel. Set Develop Settings to the appropriate preset. This is where creating several presets helps saves time, as you can pick the most appropriate one for the photos you are importing. When you click the Import button Lightroom applies the settings in the selected preset, and renders a preview that includes those settings.
Adding Copyright Info
While you’re in the Import Window, it’s worth setting up another Preset to automatically add Copyright information to the metadata of your photos when you import them.
Go to the Metadata menu in the Apply During Import panel and select New. Lightroom opens the New Metadata Preset window, where you can add information such as your name and copyright details.
Start by giving the Preset a name and clicking the Check Filled button. Under IPTC Copyright, set Copyright Status to Copyrighted and fill in the other fields appropriately (my entries are shown below).

Under IPTC Creator, add your name, website, email address and any other appropriate details. I leave out my address here as I move around a lot so it’s constantly changing (plus identity theft is a risk).
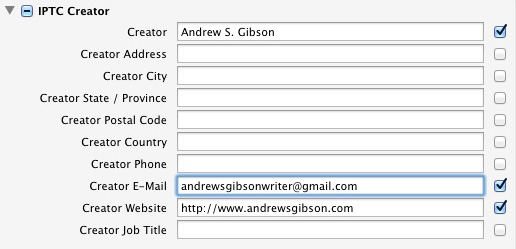
Click Done when you’re finished. When you import photos all you have to do is select the Preset you just created from the Metadata menu.
File Renaming
If you’re in the habit of renaming your photos you can set up a Filename Template to do so. Go to the File Renaming panel and selecting one of the options from the Template menu. Alternatively, select Edit to open the Filename Template Editor and create your own Template
There are lots of variations you could use here, so make sure you pick something that makes sense to you. The idea is to give each photo a unique name so that you don’t end up with more than one photo sharing the same name, as your camera’s counter cycles back around to zero.
You could go for something like your initials, followed by the date and a sequence number, as in the example below. When it’s ready go to the Preset menu at the top and select Save Current Settings as New Preset. Lightroom asks you to give the new template a name. All you have to do to use the Preset is select it from the File Renaming menu.
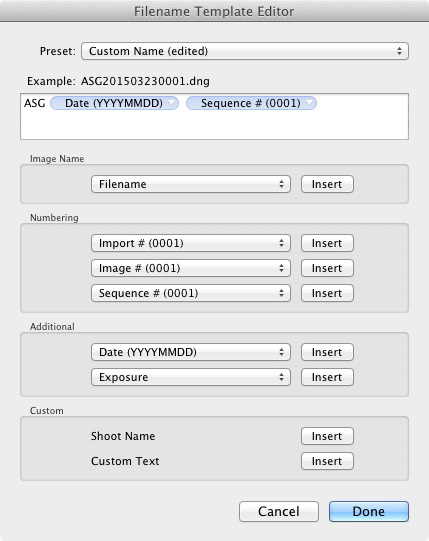
You can also add a dash in between if you like so your filename looks like: ASG-20150323-0001.dng
No comments:
Post a Comment