Vertical Shooting Tip 1: Get Low and Close
As I noted in the previous image, getting low and close accentuates the visual power of leading lines and dramatically increases the visual weight of foreground features. To go low you will need to use a tripod that has no centre column in order to get super close to the ground, I have detailed our tripod advice here which may be of interest if you are perplexed by the ins and outs of the tripod purchasing process.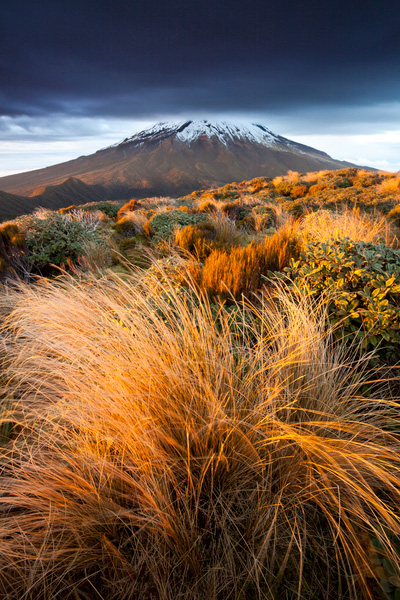
Mount Egmont New Zealand. Canon 5d mkii, Canon 17-40mm f/4 ultra-wide, Marumi polarizer. 17 mm, f/16, 1 sec, ISO100. By
getting implausibly close to the foreground grass in this scene I have
eliminated other distracting elements, increased the visual weight of
the grasses and accentuated the leading lines in the bottom right of
shot. As well as being close, I was also very low to the ground while
making this image.
Vertical Shooting Tip 2: Get High and Close
When using an ultra-wide lens it is possible to include the full sweep of a scene and accentuate the visual dynamics of the image by getting above the foreground elements and composing vertically. To achieve this you will need a tripod that extends well above the height of your subject matter and then angle the camera downwards.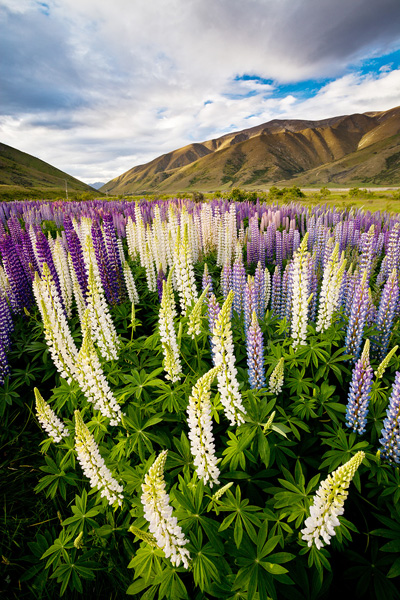
Lupine flowers, Mackenzie basin New Zealand (by Sarah Sisson). Canon 5d mkii, Canon 17-40mm f/4 ultra-wide, Marumi polarizer. 17 mm, f/16, 1/8th sec, ISO100. Sarah
had to fully extend her tripod and stand on a box in order to get the
camera above these chest high lupin flowers. The high perspective meant
that all of the meadow is visible and accentuated the space between
flowers in the foreground.
Vertical Shooting Tip 3: Break down the Composition
When composing strong verticals I tend to ‘break down’ the scene into foreground, midground and background (the same thinking helps with horizontal images of course). A good composition will contain interest in all three of these visual zones – which roughly approximates the rule of thirds compositional guidelines.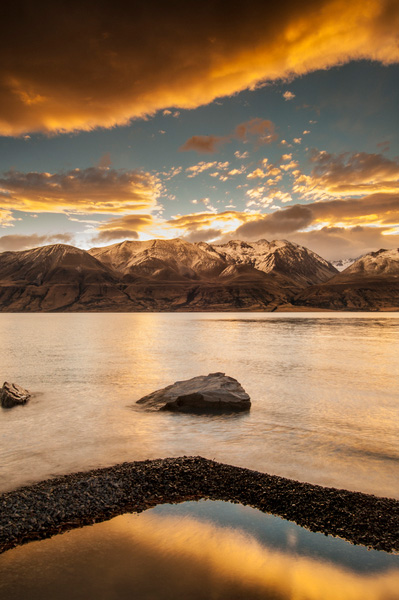
Lake Pukaki New Zealand. Nikon D800e, Nikkor 17-35mm f/2.8 ultra-wide lens, Marumi Polarizer and Singh Ray 3 stop GND filter. This
image has layers of visual interest in the foreground (gravel bar and
rocks) mid-ground (reflected color & mountains) and the background
(the sky). Note that the terms foreground, mid-ground and background
align loosely with the principles of the rule of third – I find that I
shoot more in sync with the rule of thirds for verticals than
horizontals.
Vertical Shooting Tip 4: – Leave some Space
Having just referred to the dreaded rule of thirds, I feel it my duty to throw a spanner into the works. Try messing with your vertical compositions by leaving ‘too much’ empty space. Dead space can look cool and graphic designers love it for dropping text into (sales tip).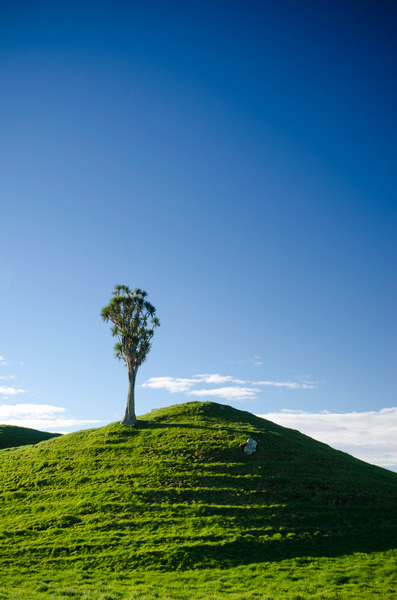
Lone cabbage tree, Taranaki New Zealand. Nikon D7000, Nikkor 16-85mm DX, Marumi Polarizer. 35 mm, f/11, 1/20h, ISO100. I
think that vertical images often look great with plenty of empty real
estate (I am a gleeful recidivist breaker of the rule of thirds). This
image has sold several times as an interior page with text dropped over
the sky portion.
Vertical Shooting Tip 5: Try Telephoto Verticals
Telephoto verticals are a particularly attractive compositional option, particularly around mountains. Because the long edge is oriented top to bottom you can exploit telephoto compression more effectively (by allowing more foreground into the frame at longer focal lengths and emphasizing the height differential across the scene).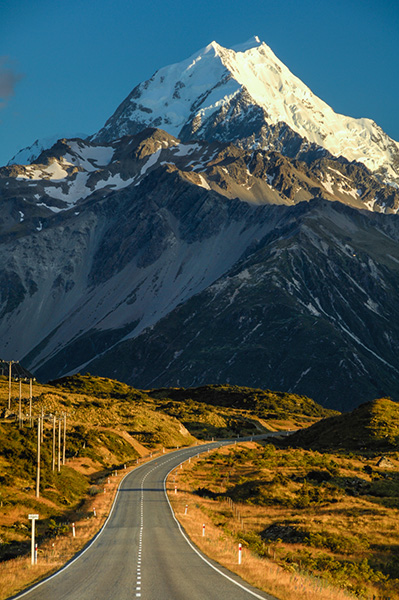
The road to Mount Cook New Zealand. Nikon D7000, Nikkor 70-200mm f/2.8 Vrii, Marumi Polarizer. 135 mm (202mm 35mm equivalent), f/11, 1/15h, ISO100. The vertical aspect exaggerates the effects of telephoto compression in scenes like this.
No comments:
Post a Comment